Flashing Against Existing Panel Siding

Pin On Diy And Crafts

This Illustration Shows The Correct Way To Detail The Transition Between Dissimilar Cladding Types A Flas Exterior Cladding Cladding Installing Exterior Door

Pin On Metal Roofs

Pin On Arch Det Envelope

Gable Large Jpg 2 375 2 880 Pixels Attic Renovation Attic Flooring Attic Remodel

Pin On Chimney
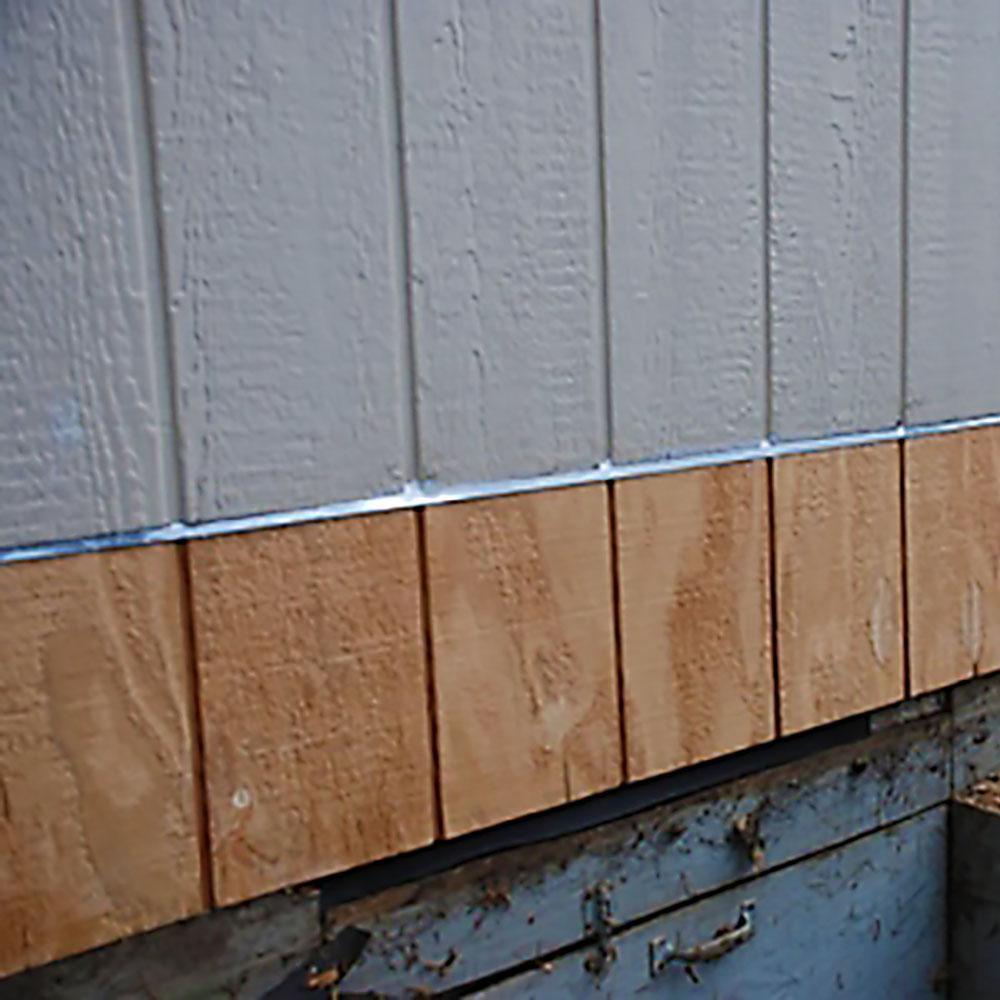
Begin at either end of the wall and set the level middle section of the z flashing onto the top edge of the siding panel with the wider flange upward and against the wall framing.
Flashing against existing panel siding.

Pin On New House Projects

Pin On Windows

Image Result For How To Trim Windows And Corners For Hardie Plank Siding Window Leaks Hardie Plank Hardy Plank Siding
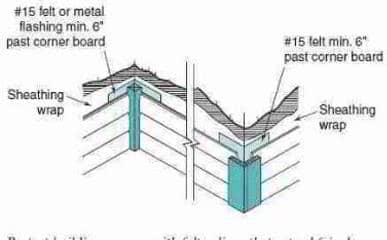
Wood Siding Flashing Details At Joints Corners

Siding Transitions Jlc Online

Installing Metal Roofing Over Shingles Metal Roof Installation Metal Roof Over Shingles Metal Shingle Roof

Pin On Siding

Replacing Metal Corner Caps On House With Wood Siding Siding Repair Masonite Siding Wood Siding

Pin On James Hardie Siding

Pin On For The Home

Tile Sidewall Flashing Flashing Installation Matterhorn Metal Roofing Youtube

How To Flash Corrugated Barn Roofing Google Search Metal Roof Installation Roof Installation Corrugated Roofing
Gibraltar Building Products 3 8 In X 10 Ft Galvanized Steel Z Bar Flashing Szb38g The Home Depot

Vinyl Soffit Aluminum Trim Coil Work Together To Protect Your Eaves Vinyl Soffit Vinyl Siding Drip Edge

Gutter Dimensional Roof Shingles Roofing Accessories Tile Modified Bitumen Contractor Talk Firestone Metal Syste Roof Installation Roof Drip Edge Roof Shingles

Pin On Remodel Ideas

Jamb Detail For Window Install Interior Windows Window Frame Interior Window Trim

Pin By Gerardo Barrabino On Detalles Constructivos Metal Roof Vents Metal Roof Standing Seam Metal Roof
Https Encrypted Tbn0 Gstatic Com Images Q Tbn 3aand9gcthk Radxm Tk9mzfeyuebbcb2ixkn Qb9tqeefvpnyzzhcgtfz Usqp Cau

Siding Replacement Wars James Hardie Vs Lp Smartside In A Battle For Contractors Builders And You In 2020 Hardie Replacing Siding Siding

Pin On Building Ideas

Drip Cap For Wood Siding Google Search Timber Battens Small Cabin Plans Wood Siding

Remediation Details Roof Claddings Branz Weathertight Roof Cladding Skillion Roof Cladding

Pin On Arh Details
Source : pinterest.com
